How to Integrate Microsoft Teams with Preppio
Pre-requirements:
Administrator access for MS Teams and Microsoft Azure is required for the person doing the installation.
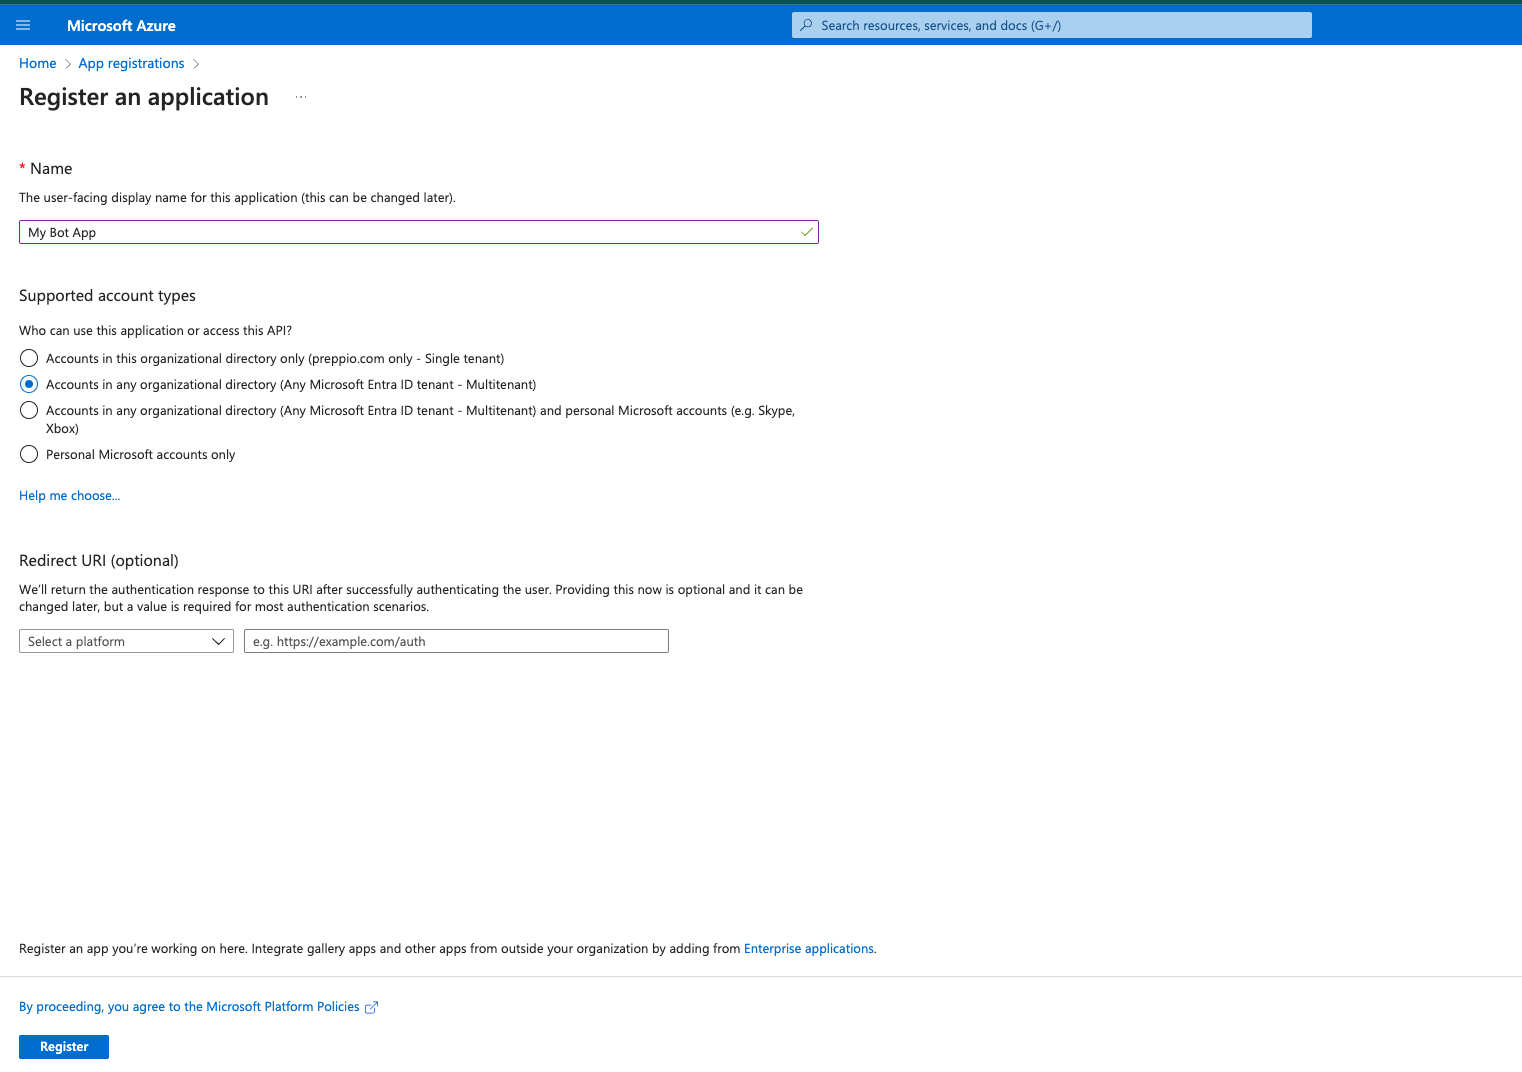
1. Start by going to Microsoft Azure and create a new App Registration. Name your application and select a multi tenant account type. Click on register to create your application.
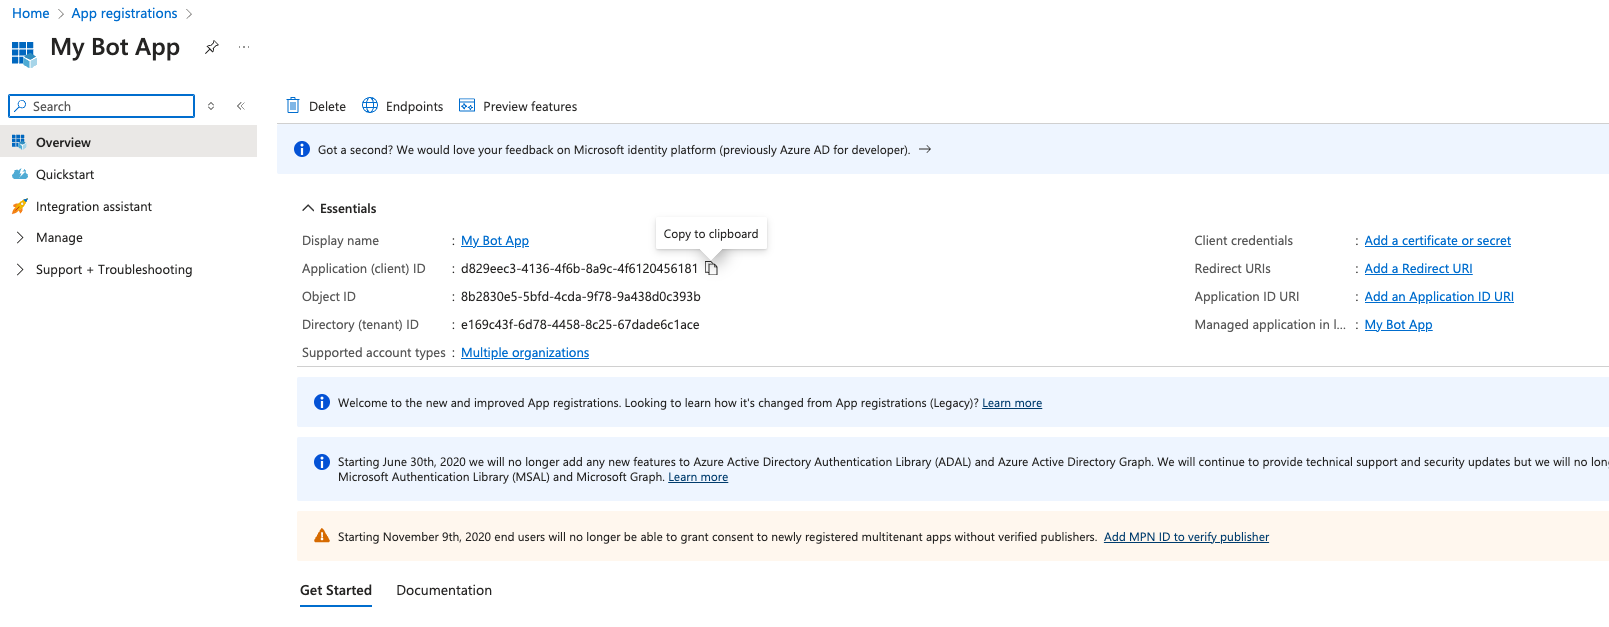
2. Your application is now created, you need the Application client id and the Directory tenant id values. You can copy these values somewhere or remember where to find them later in the installation process.
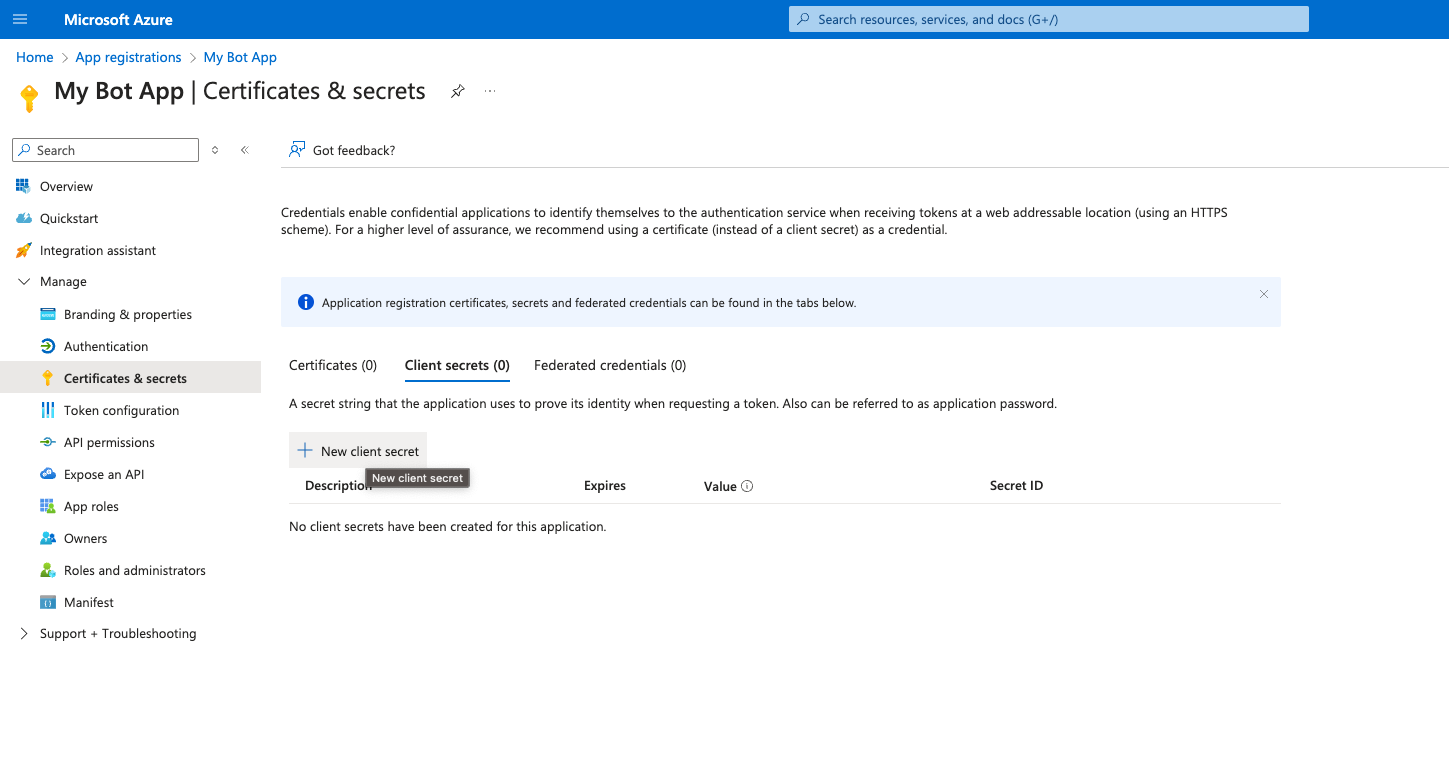
3. In the left-hand menu, click to unfold the "Manage" tab and then choose the “Certificates & secrets” option. Your next step is to generate a new secret. While we suggest setting its validity for 12 months, allowing for a key change or rollover during that period, the frequency of updates is ultimately up to you. After creating a new secret key, be sure to copy its value field and save it in a secure location for easy access later in the setup process.
Tip! It's crucial to copy only the value field, ignoring the other fields available.
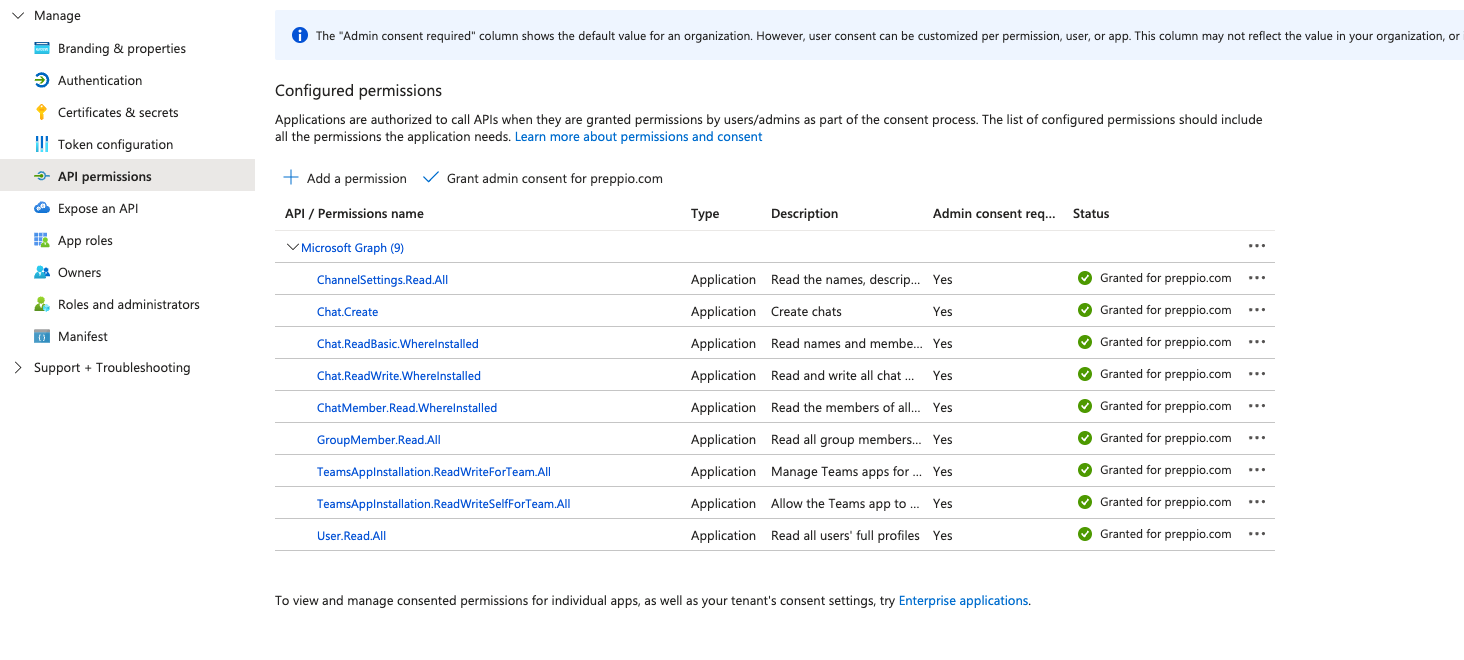
4. Next, add “API Permissions” again from the left hand side. Add the following permissions and provide admin consent to them all. Select add a permissions -> Microsoft Graph -> Application permission. Then search and add the following permissions:
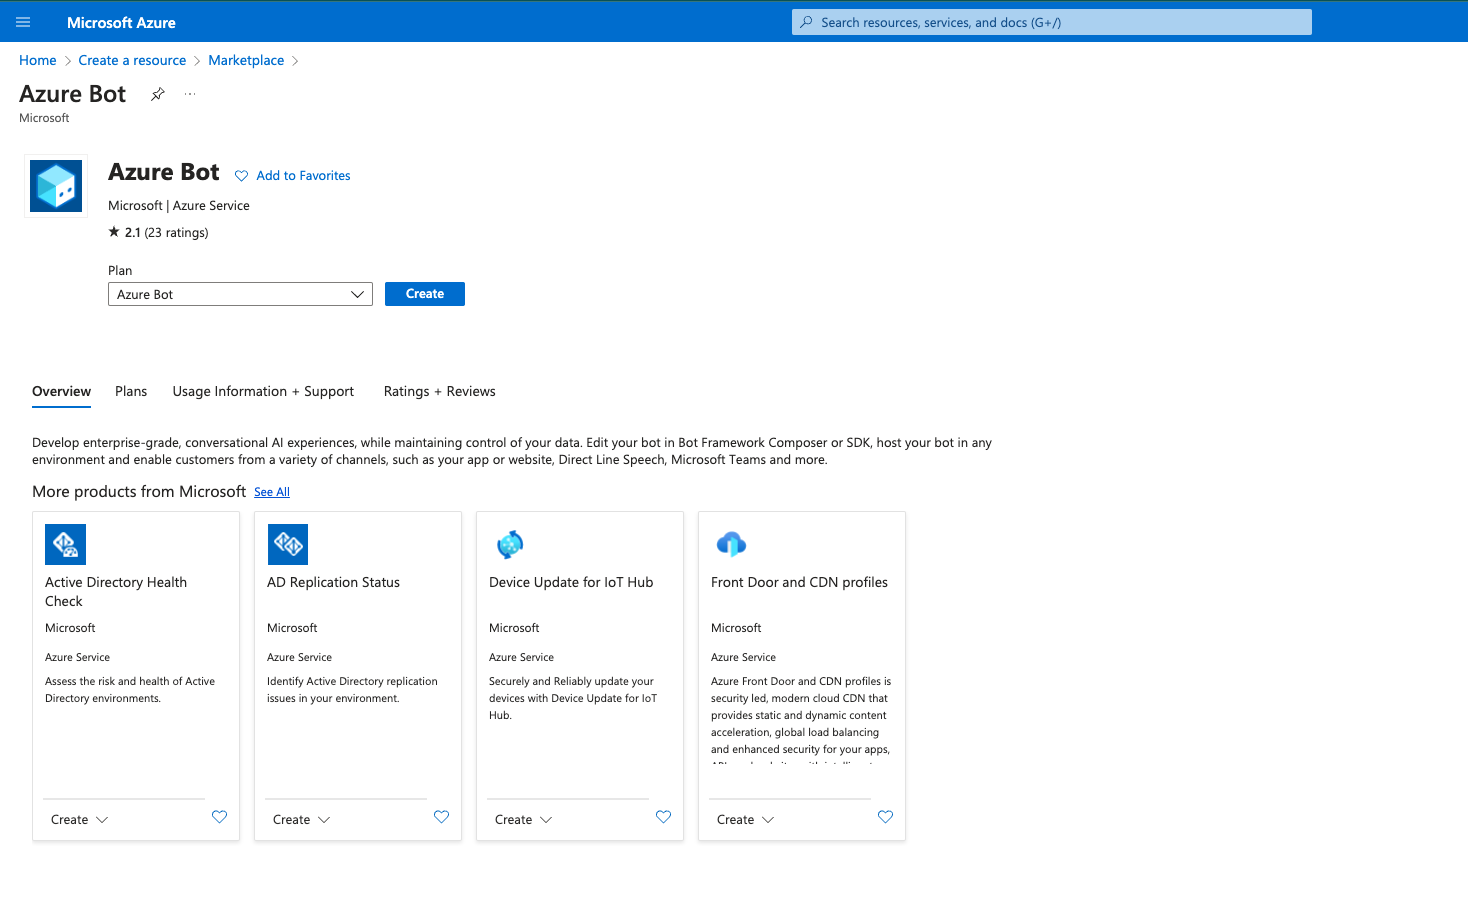
5. After completing the preceding steps, it's time to gracefully exit the app registration area. Our journey continues as we embark on setting up an additional Azure service. Venture into the Azure portal and use the search feature to discover and add a new service known as Azure Bot Service.
Once you've initiated the creation, navigate to the newly minted resource to embark on the customization process.
-
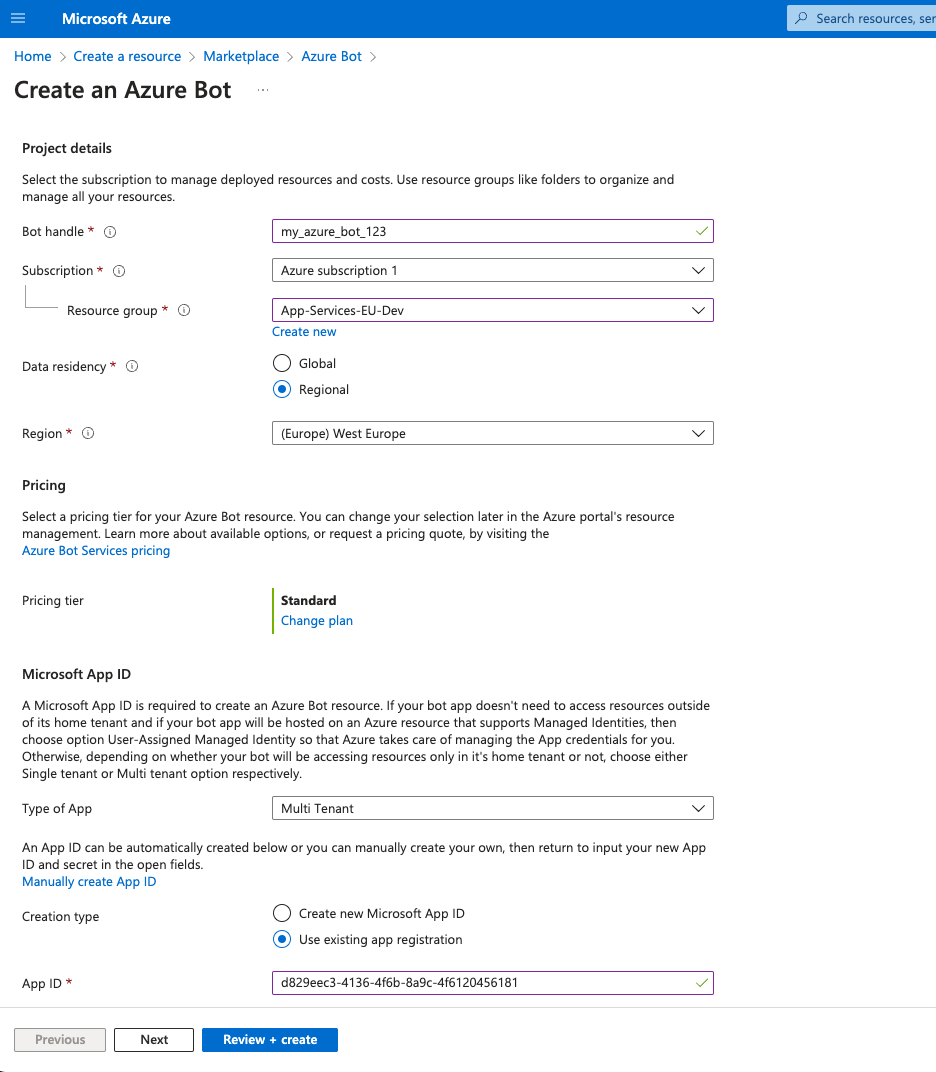
Assign a distinctive name, resource group, and subscription to your bot service, tailored for your organization. Choose a specific region to host your data, or opt for a global setting if preferred. Ensure the pricing tier is set to standard. Next, link your bot service to the app registration created in our prior step. If not already done, adjust the service type to multi-tenant, then proceed to “use existing app registration,” providing the application client ID from your earlier app registration (earlier steps).
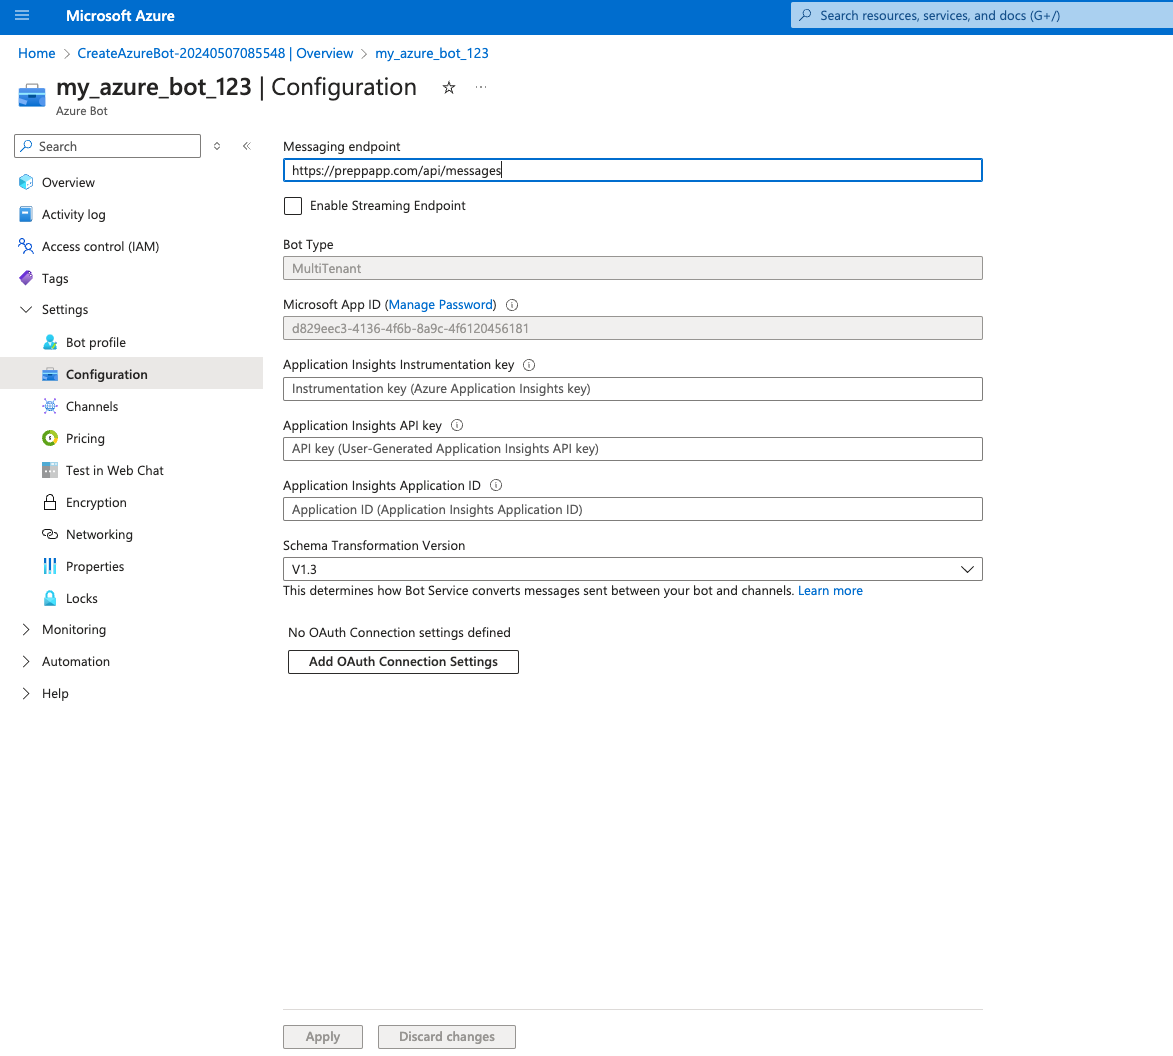
7. Following the creation of your Azure service bot in the step prior, navigate to the “Configuration” option, located on the left-hand side under Settings. This step is crucial, as here you will specify the messaging endpoint. This endpoint is the digital ear for the Preppio application, allowing it to receive notifications of any updates to your bot. Please input the following URL: https://preppapp.com/api/messages
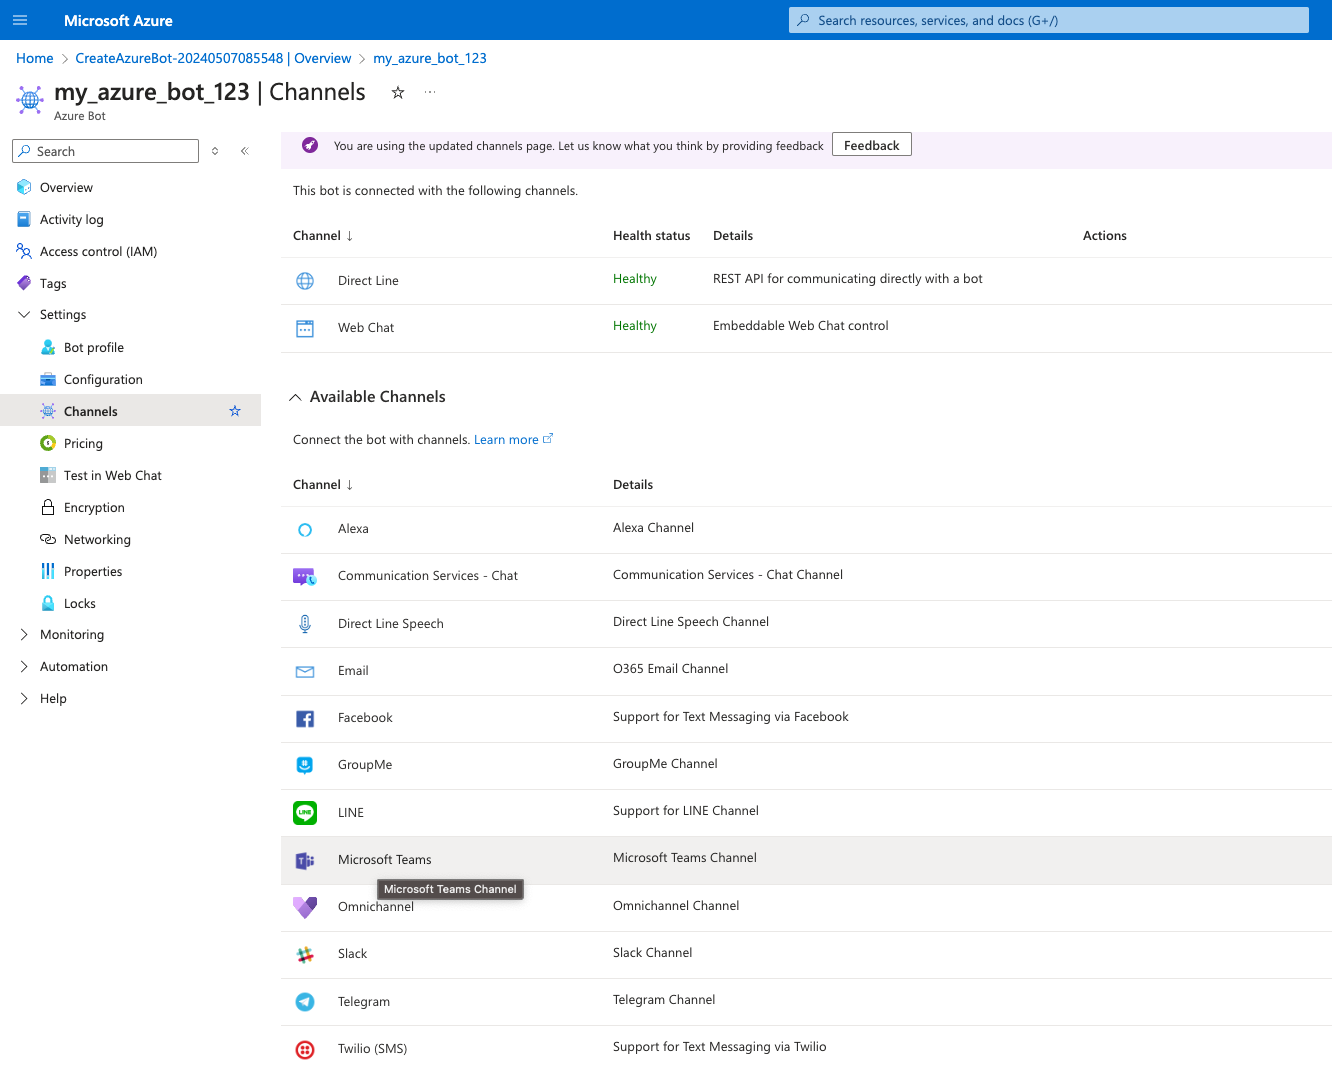
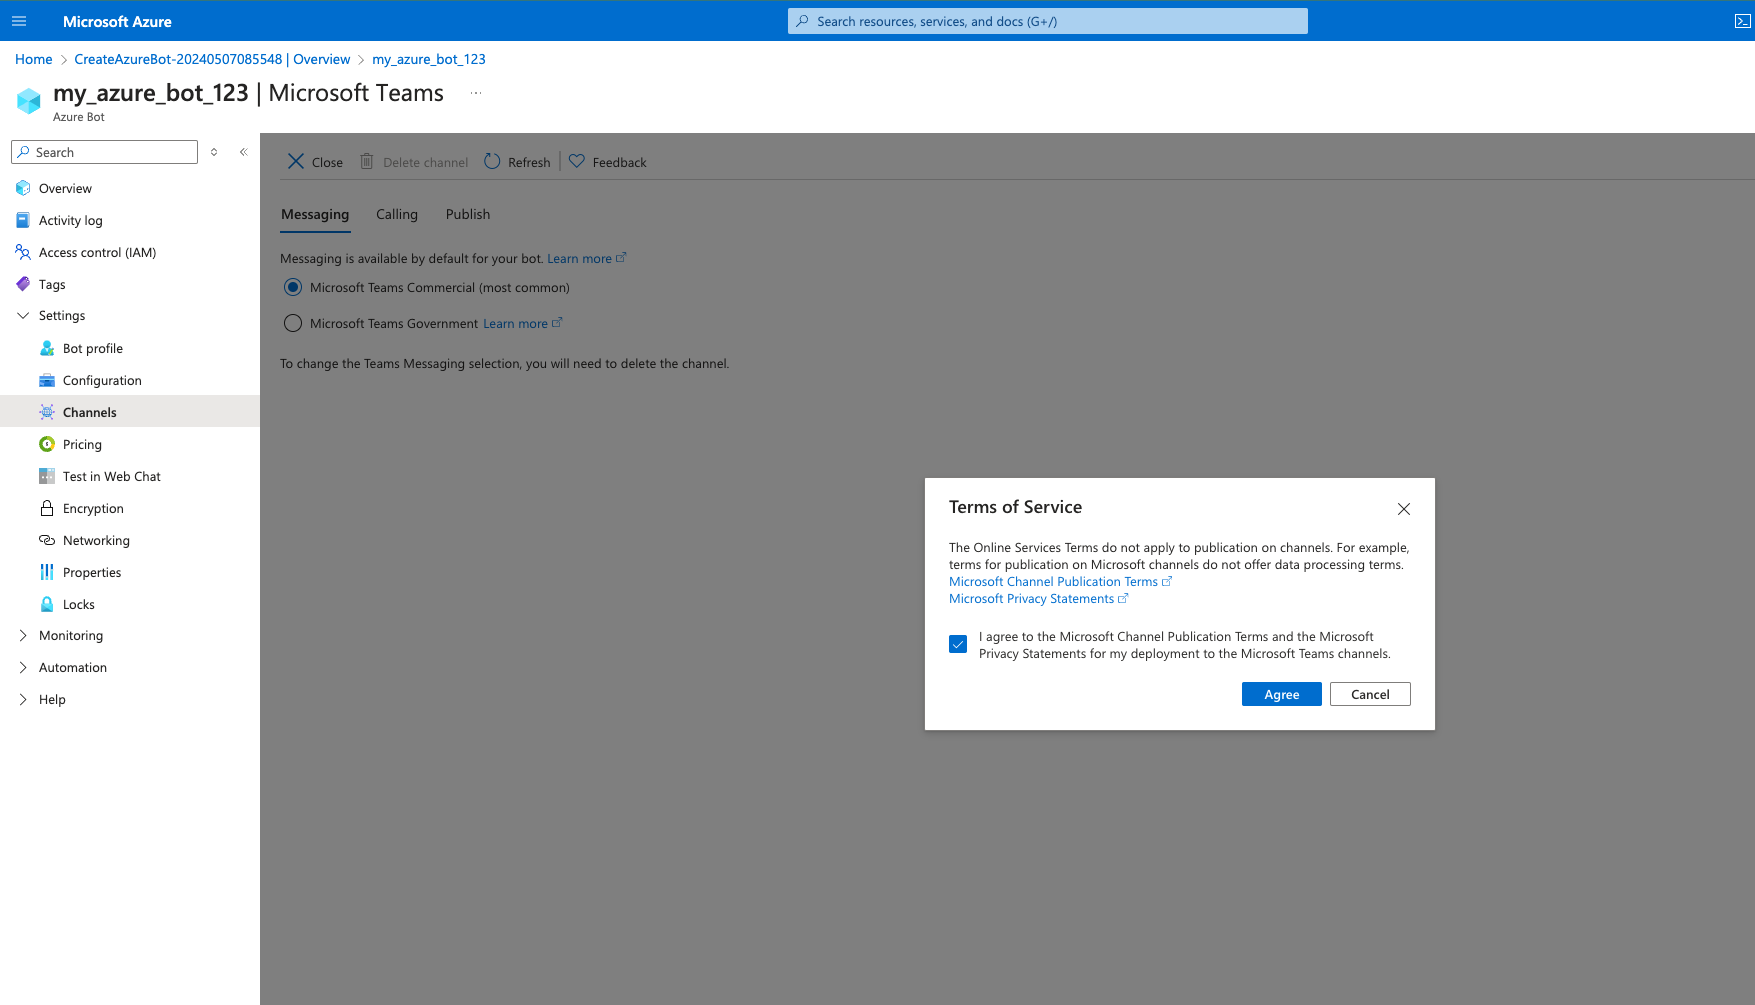
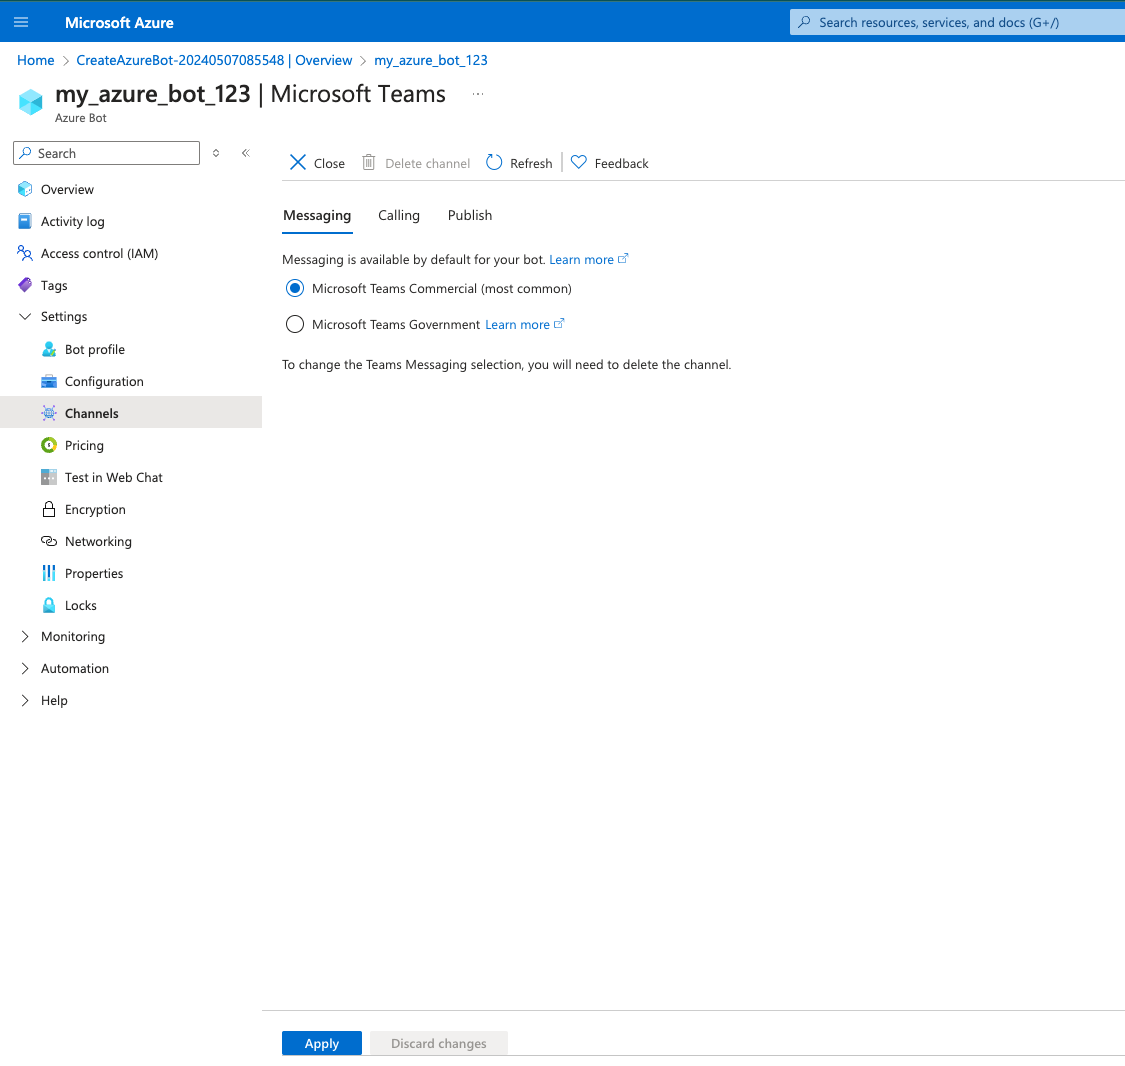
9. Next, navigate to the channels area and choose Microsoft Teams. Agree to the terms and conditions before saving your choice. Remember, you'll need to click on the Microsoft Teams wording to activate the selection option for this step.
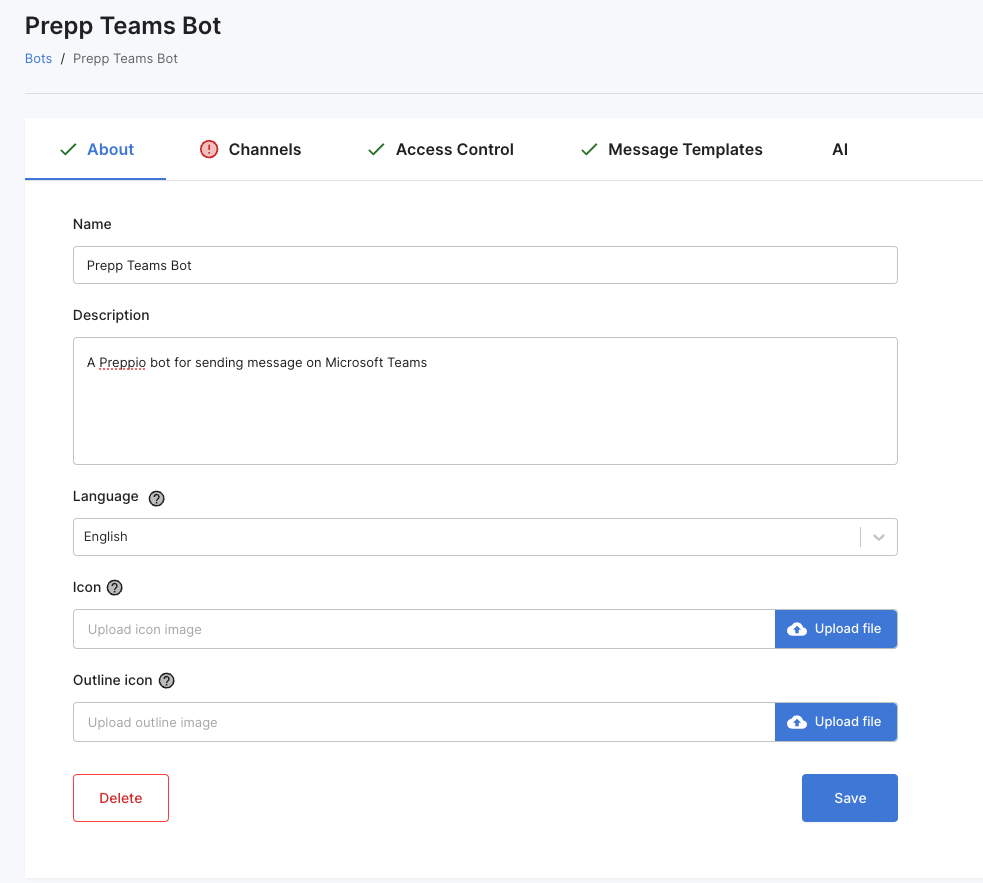
10. Now, proceed to the Preppio app, navigating to the settings area to either forge a new bot or integrate a Teams channel with an already-existing Preppio bot. The bot's name and description you decide on will be mirrored in your Microsoft Teams setup. It's crucial to select a resonant name and description, along with appealing icons that will be visible to your users during their interactions with the bot in Microsoft Teams. Glide your cursor over the question marks for insightful tips regarding the sizing of icons. Should you opt not to specify any details, the bot will default to a standard icon.
11. Select the channels tab to configure a Teams channel for the bot.
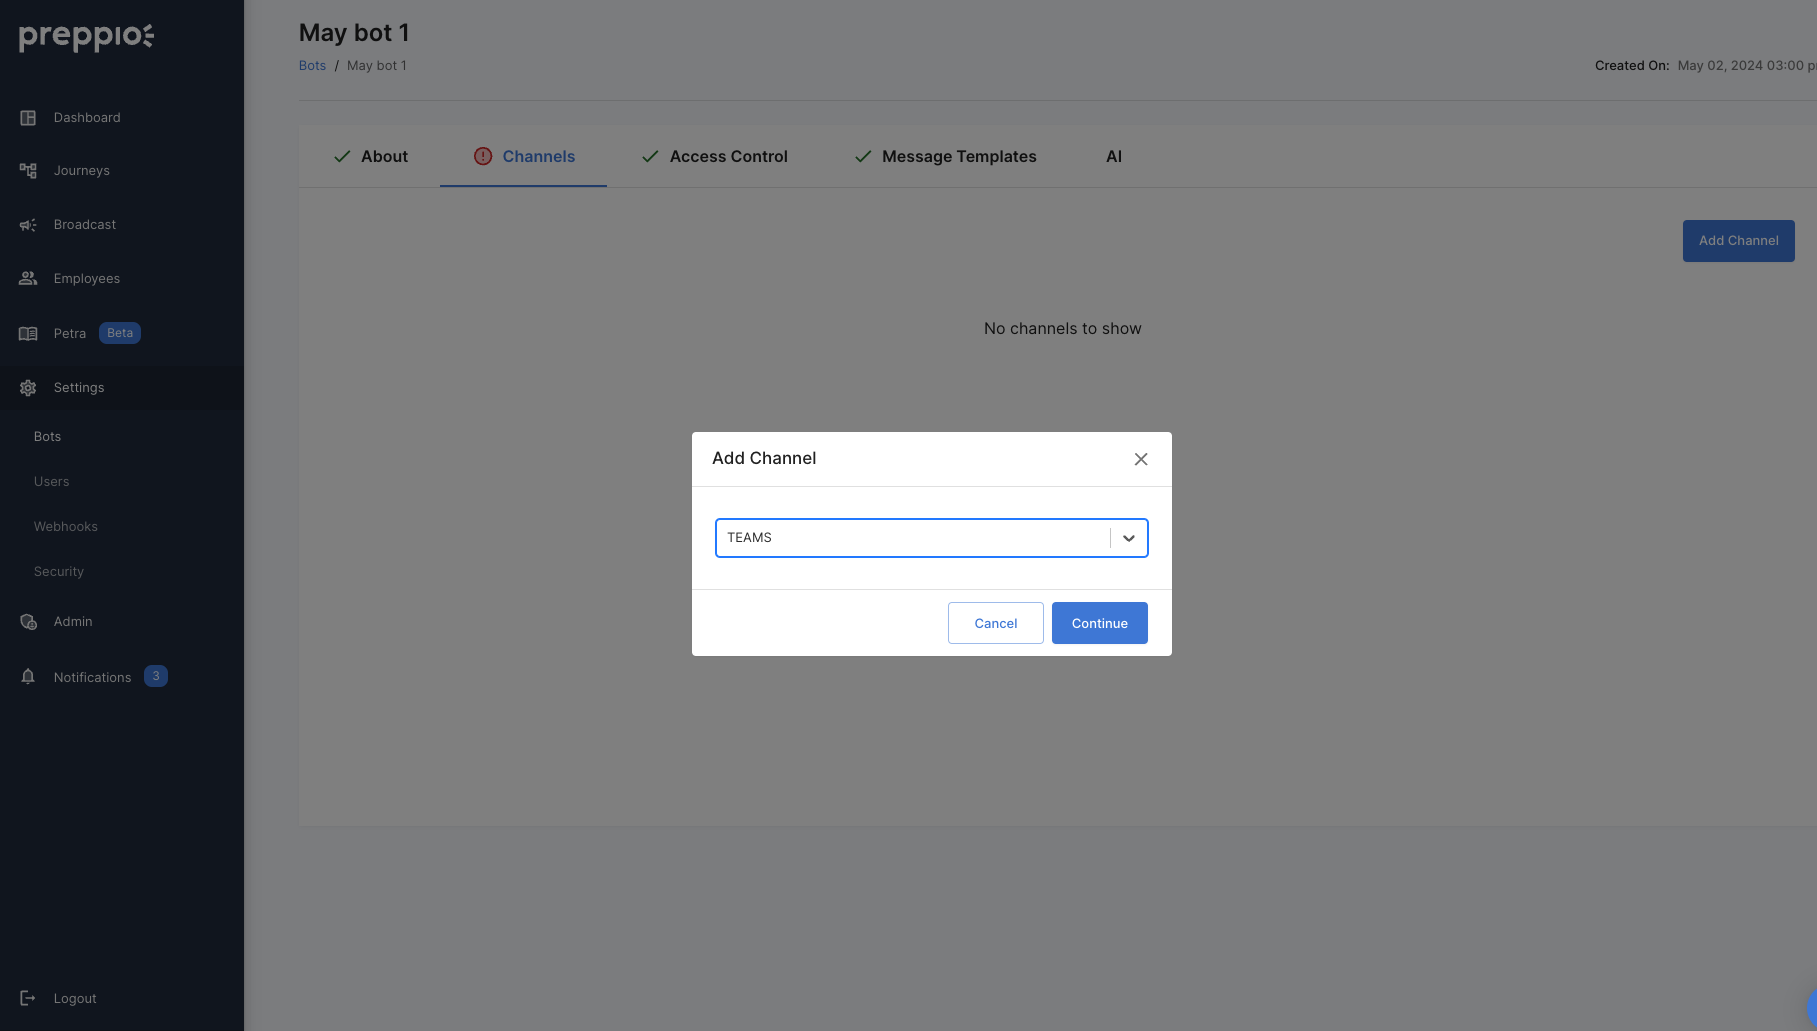
12. Next, you will need to add the keys and values created in Microsoft Azure for your app registration. The following keys/values are required:
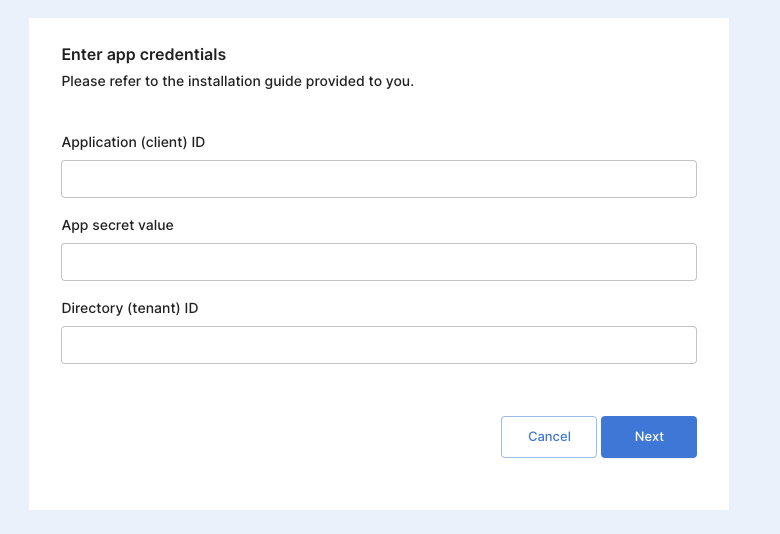
13. After entering the keys, click on "Next." Should any issues arise, you will be alerted with an error message which must be resolved before moving forward.
14. Following the input of all necessary values, it's time to download the app package. This step involves saving a zip file, as shown in the reference image below, which contains all critical information needed to deploy the application within your organization's Microsoft Teams app store.
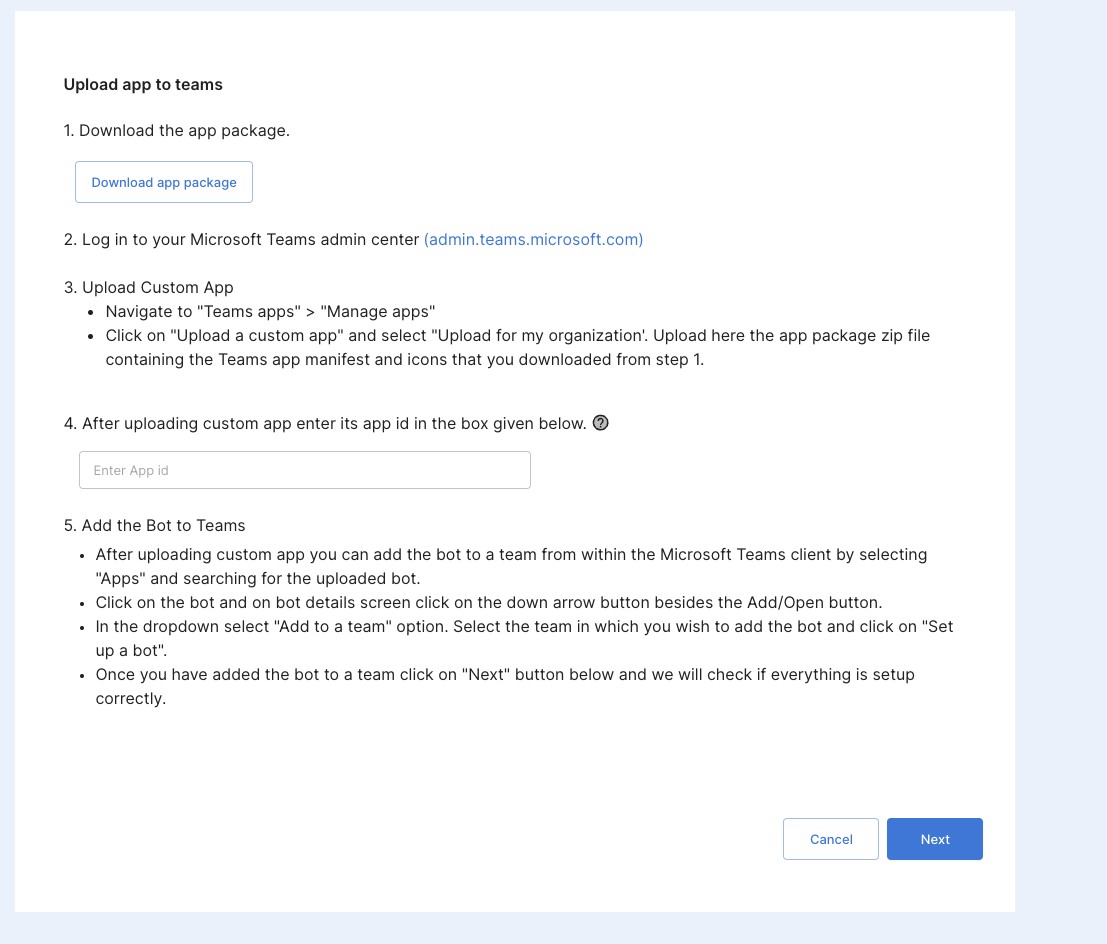
15. Once you downloaded the app package visit:
https://admin.teams.microsoft.com
After downloading the app package, proceed to https://admin.teams.microsoft.com and navigate to "Teams Apps" then click on "Manage Apps". On the right side of the screen, look for "Actions" and choose the option to upload a new app. At this point, you'll want to upload the app package you've previously downloaded. Once the upload process is complete, locate your app in the list and make a note of its app id value for future reference (see the reference image provided for guidance on locating the correct value).
Remember, the app id value you're noting here is distinct from the application client id value that was generated in Azure.
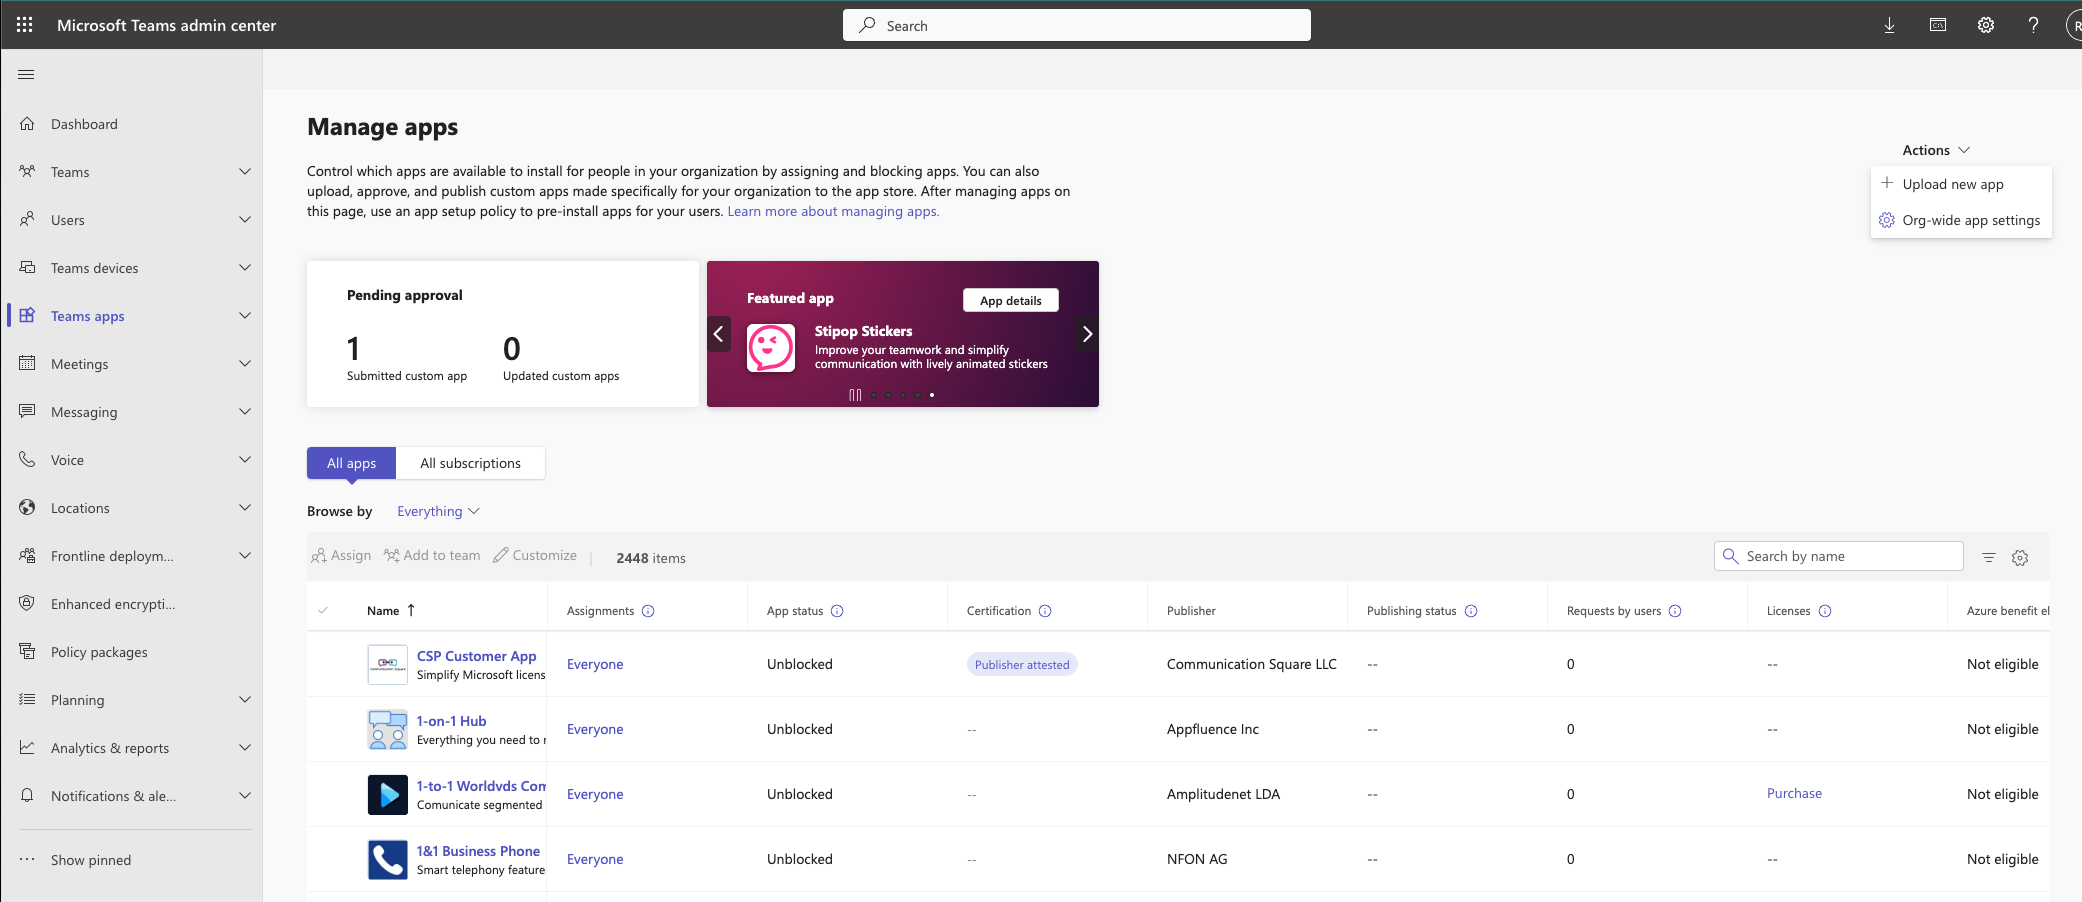
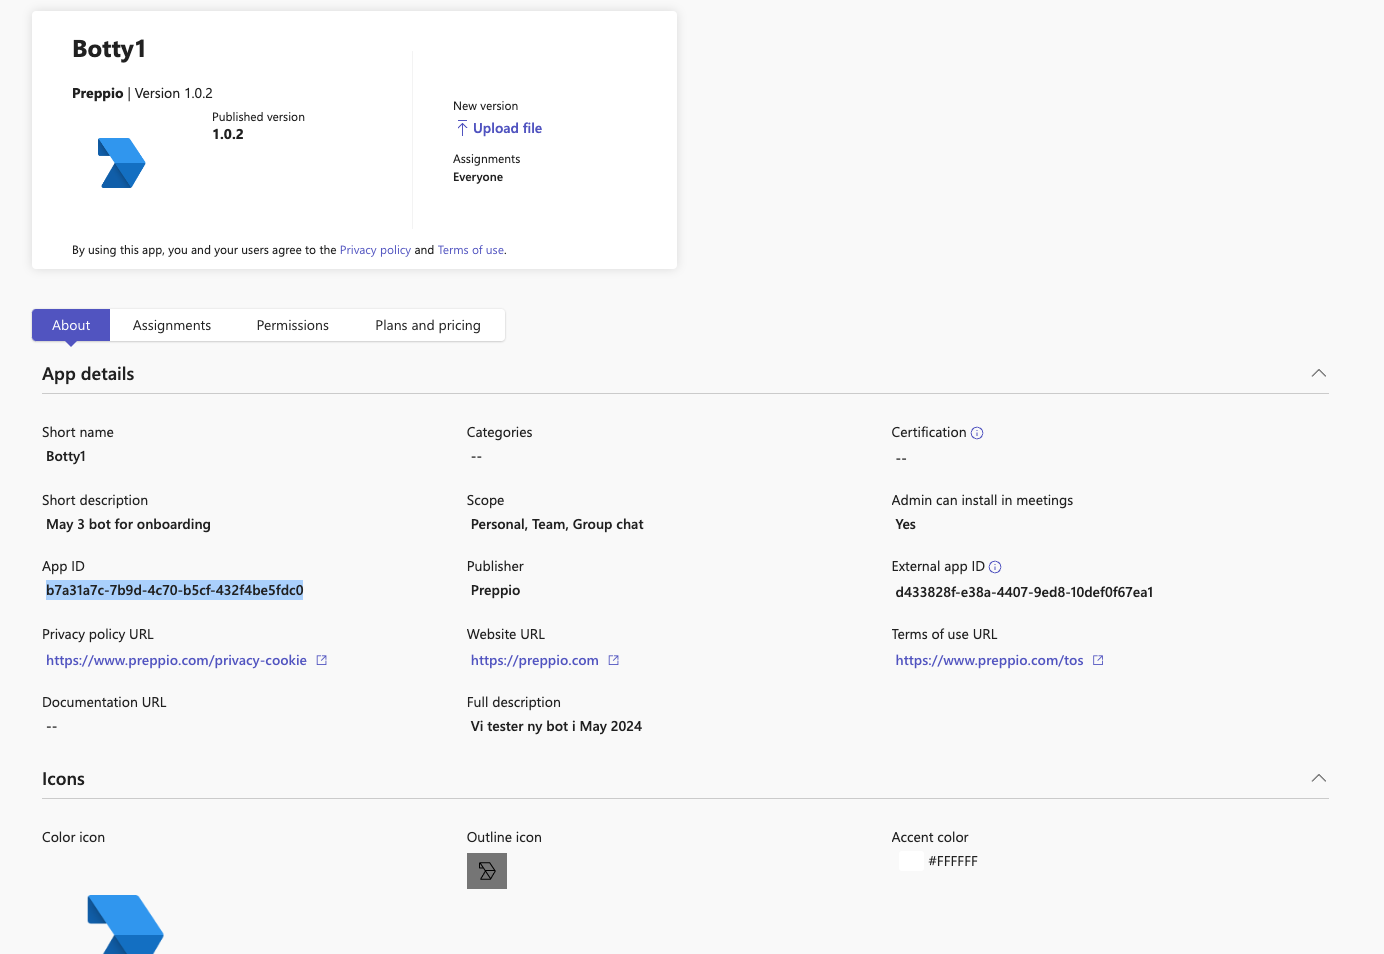
18. Return to the Preppio application and input the App ID for the application you've uploaded to your organization’s app store. Not sure which App ID we mean? Click the question mark icon next to the entry field for a helpful screenshot that shows exactly where to find it.
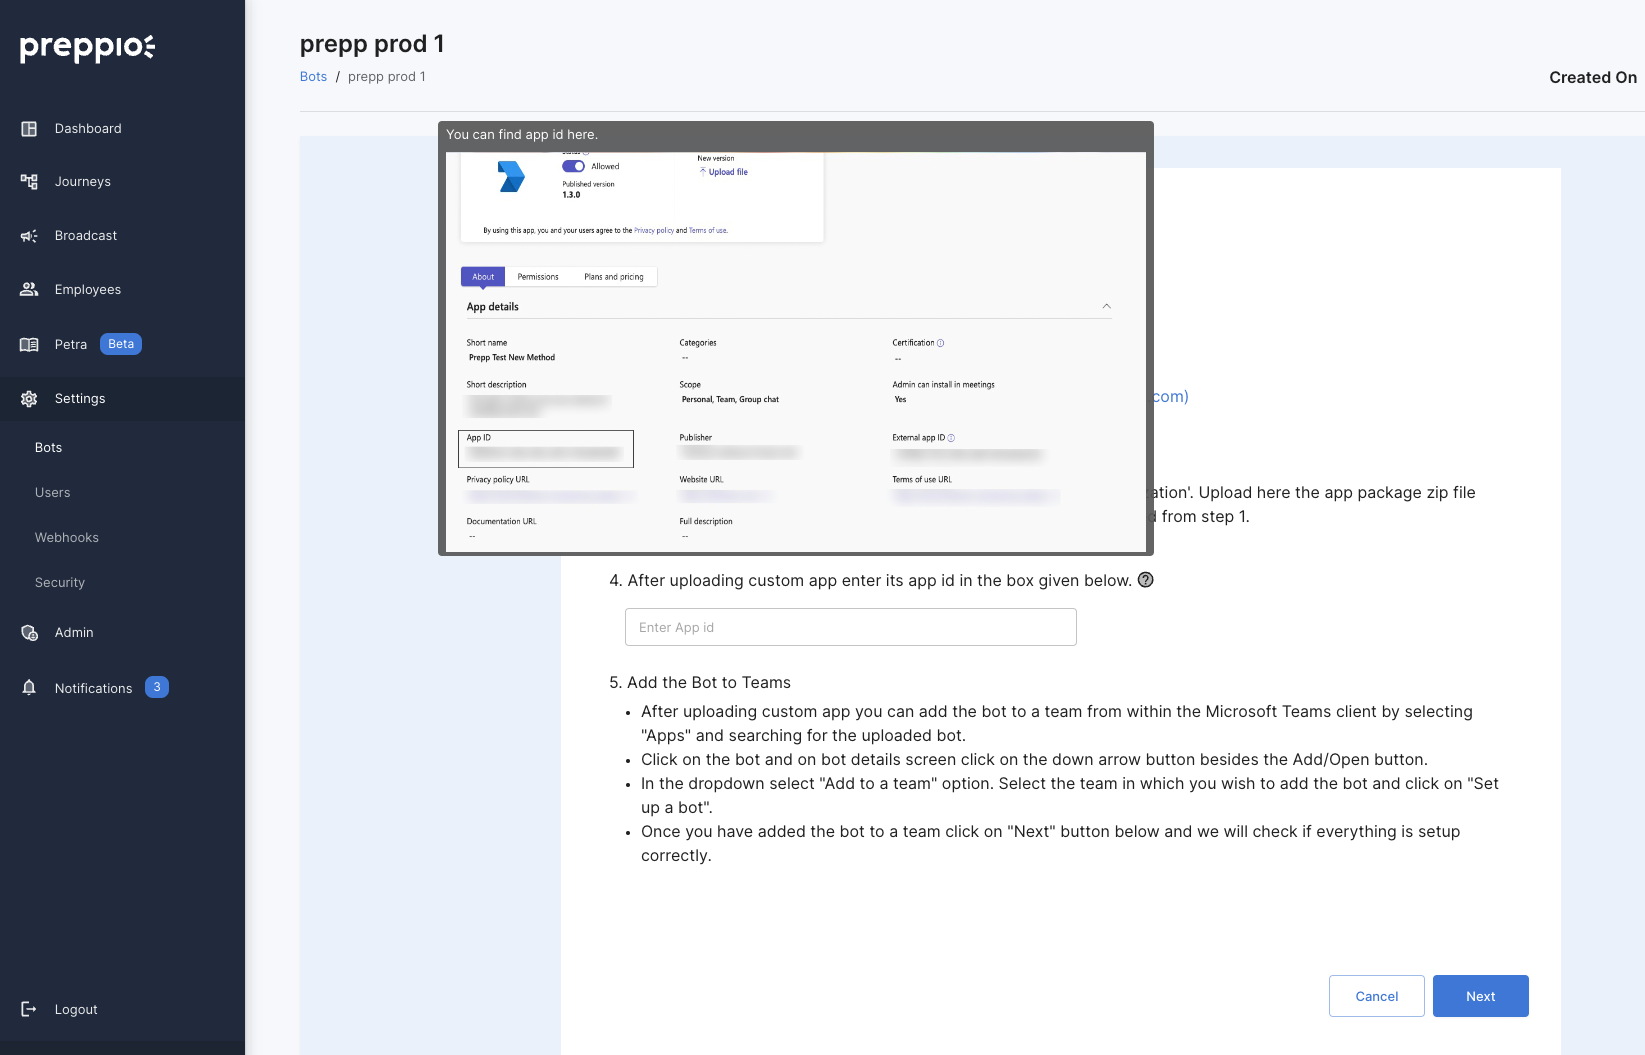
19. After you've entered the app id, click on Next to proceed. This will enable you to begin the process of integrating the bot into selected teams or groups.
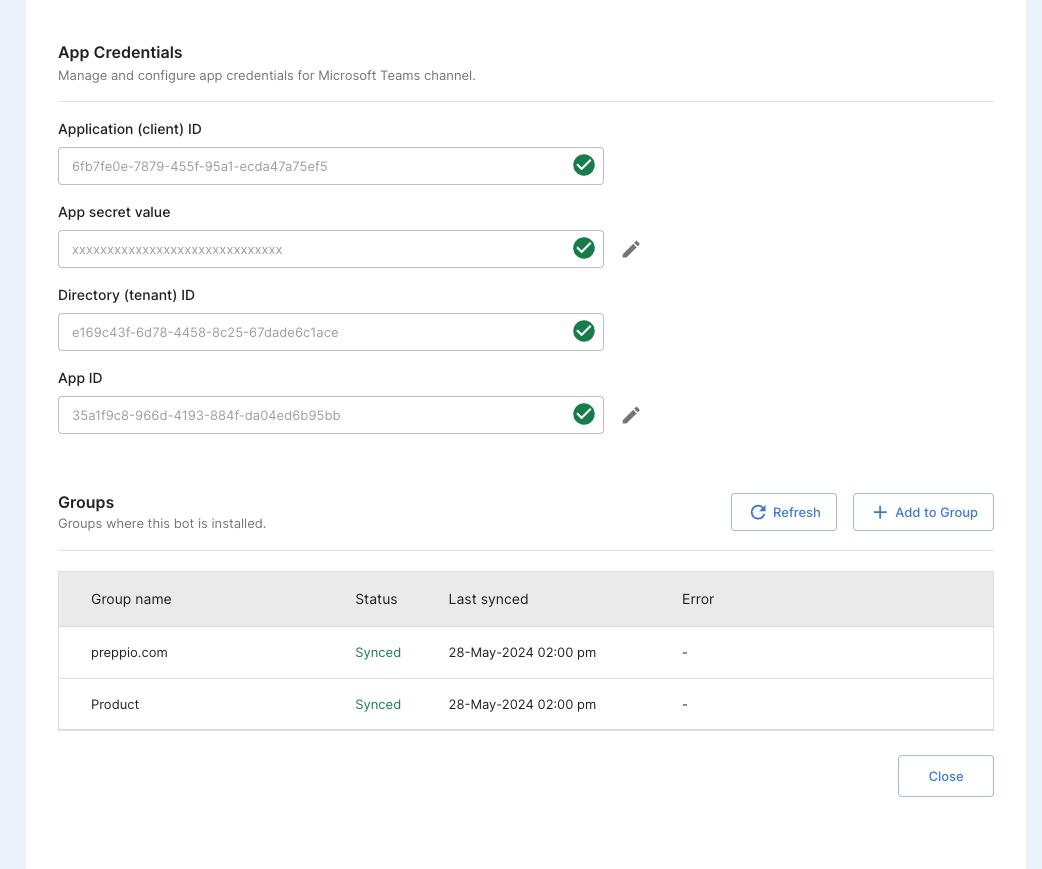
20. Extract links from your Microsoft Teams groups/Teams effortlessly. Click on "Add to Group" to seamlessly integrate the bot into your chosen Microsoft Teams group. For a step-by-step guide on extracting team links directly from Microsoft Teams, see the images provided below.

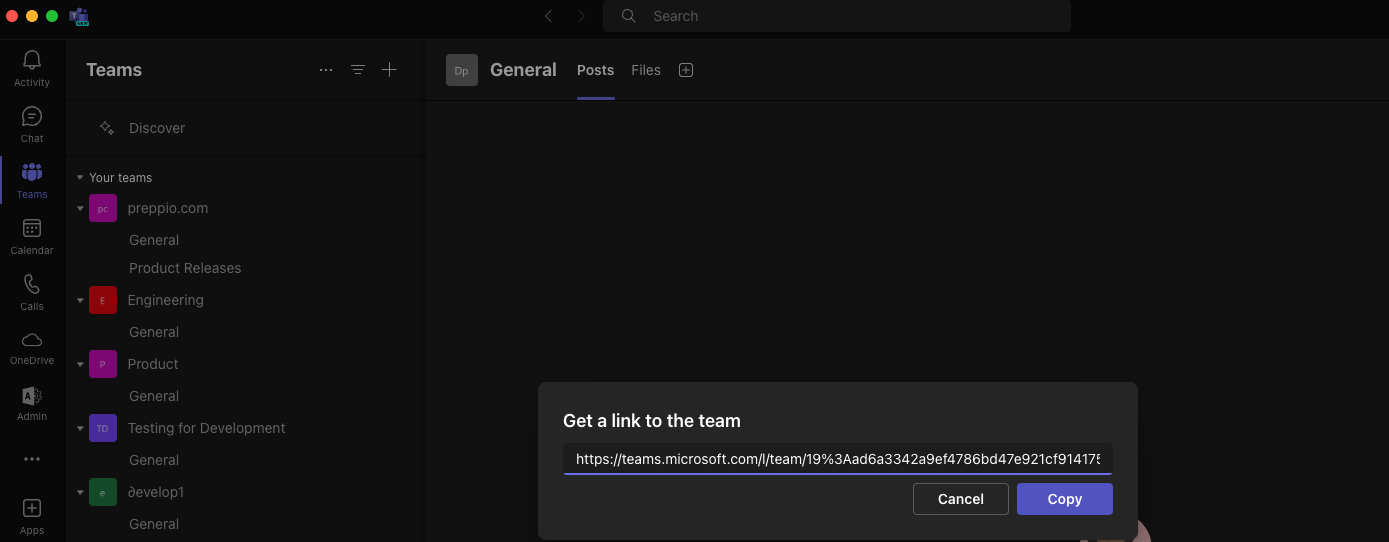
After integrating these links into your desired teams for bot installation, the integration will seamlessly begin to synchronize and gather member data from Microsoft Teams. Congratulations, your setup is complete!
Tip: Feel free to dynamically adjust which groups are part of the integration by adding or removing them as needed. Just keep in mind, each change requires a bit of time to fully process, so patience is key!

